
This is an unglamorous project with great results.
You will need: an old Atari 7800 Pro Controller, a Happ Controls Joystick and 2 Arcade buttons and some kind of project box.
This is the exact project box I used (I get nothing for linking this).
Most of the Happ Style joysticks and buttons are counterfeit but the ones at Microcenter are excellent.
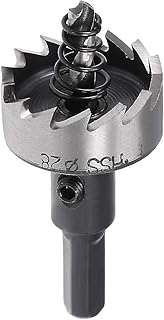
Any of the top-rated 28MM hole saws will work. I used one from HSS. Looks like this:
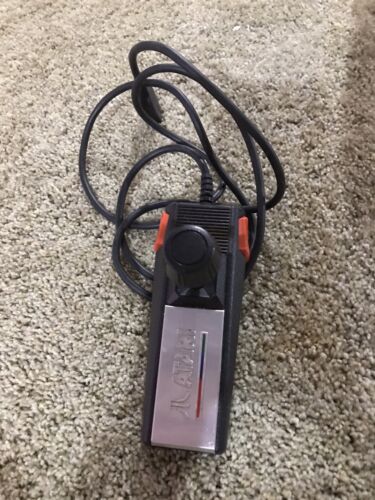
I gutted a real Atari 7800 Pro Controller because most of the cables out there are for Atari 2600, so they are missing the second button wiring. You can get them cheap off of ebay. I believe since you are going to gut it for the wires and the resistors on the circuit board, cosmetics are beside the point. I saw some controllers on ebay in the $6-$8 range.
Here’s what I did:
Put some masking tape on the top surface of the project box and using a sharpie, layout your controls, the middle hold and mounting holes of the joystick and the center-lines of the buttons.
Drill the joystick & button holes using the 28MM Dia hole saw. Then drill your screw holes. I think a 1/8″ drill will do it. Now peel off the masking tape and mount your controls.
Then you will take apart your Atari 7800 Pro Controller and carefully remove the wires from the circuit board. You might need to clip off the terminals from the Atari 7800 joystick and crimp better terminals. If you really don’t care what this thing looks like and you are brave, you could solder the wires right to the micro-switches. Who am I to judge? (Don’t do this.)

This is a wire map of the Atari 7800 Pro Controller:
Brown / Left
Green / Right
Blue / Down
White / Up
Button 1: Top Orange, Bottom Yellow & Resistor to Black
Button 2: Top Orange, Bottom Red & Resistor to Black
Using this wire map and the picture above, solder the wires and tape it up. The tricky part: you desolder the (2) 620 OHM resistors from the Atari 7800 Pro controller circuit board but you can can also buy new ones. These go between the ground wire and the ground terminal on the two buttons. You can clearly see this in the image above. Test it out and if you get it right, put the box together and ENJOY. Atari is much, much more fun with Arcade controls IMO.
Caveat: Before you drive yourself crazy like I did when testing: the difficulty switch on the front of the 7800 actually makes a difference with the 2 button games in some cases. For instance, when testing Xevious, both buttons launched missiles AND bombs simultaneously. I remembered that one should send a bomb and the other a missile. Well…”LEFT” difficulty does that. *slaps forehead* I ended up ripping the joystick apart driving myself crazy as to what went wrong when really nothing was wrong. UGH 😉
Unglamorous? The beauty is in the simplicity, awesome job. I have a spare 7800 controller i want to try this with. Also your rewiring answered alot of questions ive alteady had.
Amazing
Thank you tachyon. Please let me know if you ended up making your own Atari 7800 arcade joystick and if it went well.